
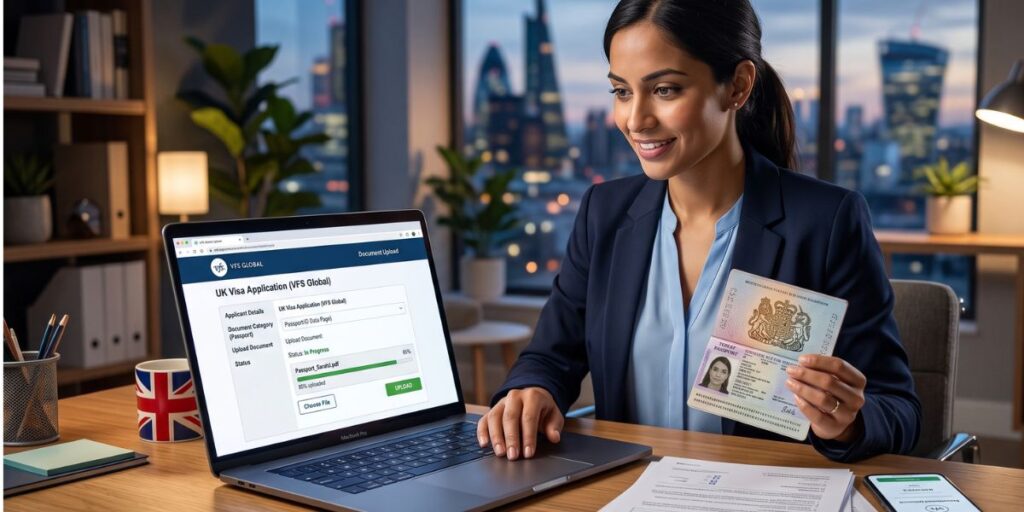
Applying for a UK visa already feels like a big task. You have to choose the right visa, gather supporting evidence, pay the fees, and attend biometrics. On top of that, many applicants worry about one practical step more than anything else: uploading their documents correctly.
That is why so many people search for how to self upload documents for UK visa VFS. They want to do it themselves instead of paying for document upload help or risking mistakes at the visa centre. That makes sense. If your files are clear, complete, and placed in the right category, self-upload can be a simple and cost-effective option. VFS Global states that applicants can upload supporting documents online free of charge, while UKVI also explains that paid scanning or upload help is an optional service and does not make an application more likely to succeed.
In simple terms, self-upload means you prepare your visa documents yourself, sign in to the relevant portal, and upload each file before your biometric appointment or before the system locks your evidence. The exact screen can vary by route, country, or platform version, but the core task stays the same: get the right files ready, upload them under the right heading, and review them carefully before you move on. UKVI’s evidence guidance also says applicants should check their files before final submission, because in that process no more evidence can be uploaded after submission.
This guide gives you a practical walkthrough. It covers what self-upload means, who should use it, how to prepare files, where the upload section usually appears, how to upload documents step by step, what documents people commonly include, what mistakes to avoid, and what to check before biometrics. It also uses current UKVI and VFS Global guidance so the advice stays grounded in the real process rather than guesswork.
What Does Self Upload Mean for a UK Visa Application?
Self-upload means you upload your supporting documents yourself through the visa application system instead of paying a centre to scan or upload them for you. For many overseas UK visa applicants, VFS Global runs the visa application centre where biometrics are taken, while UKVI decides the visa application itself. If you are applying from inside the UK, document handling is often done through UKVCAS instead, not VFS.
This is different from document upload assistance. With assisted upload, you bring your papers to the centre and pay for help with scanning or uploading them. UKVI makes it clear that these are optional services only. They may be convenient for some applicants, but they do not improve your approval chances.
It is also different from simply carrying papers to your appointment. Your biometric appointment is mainly for fingerprints, a photo, and identity checks. It is not the stage where you should first discover that a file is missing, unreadable, or in the wrong place. Many problems happen because applicants treat upload as a last-minute task. A better approach is to treat document upload as part of the application, not as a small add-on step.
Who Should Use the Self Upload Option?
Self-upload is a good fit for applicants who already have clean digital copies of their documents. If you can scan or photograph papers clearly, save them in the right format, and upload them in an organized way, there is no reason to fear the process. UKVI’s guidance even BUY PASSPORT ONLINE explains basic scanning and photo upload steps, including accepted file formats and the importance of descriptive file names.
It also works well for people who want more control. When you self-upload, you can name files properly, group related evidence, review the final set, and make sure everything looks logical before the appointment. That control matters because a neat file set makes the case easier to follow, especially in applications with bank statements, employment records, sponsorship evidence, family documents, or visa-specific papers.
Self-upload can also save time at the visa centre. You arrive knowing that your evidence is already prepared and reviewed. In many cases, that means a smoother appointment day because you are not depending on same-day scanning, printing, or document sorting.
That said, assisted upload may still be better for some people. If your scans are poor, your case is document-heavy, you are not confident with file handling, or your internet access is unreliable, paid help can reduce stress. The right choice is not about pride. It is about accuracy. If you know you are likely to upload the wrong file or miss a required page, help may be worth the cost.
Before You Upload: Prepare Your UK Visa Documents Properly
Preparation is where good visa uploads begin. Most upload problems are not really upload problems. They are preparation problems. The file is blurry. The pages are incomplete. The bank statement is missing the latest month. The translated document was forgotten. The wrong file name was used. These are avoidable issues.
Gather the exact documents for your visa type
Start with the specific visa route you are applying for. UKVI says you will be told what supporting evidence you need during the application process, and the required documents can change depending on your visa and circumstances.
For example, a Student visa application normally requires a valid passport and a Confirmation of Acceptance for Studies, often called a CAS. Depending on the case, the applicant may also need financial evidence and other route-specific documents.
A Skilled Worker visa application usually involves a valid passport, certificate of sponsorship reference number, proof of English where required, and sometimes bank statements, tuberculosis test results, or relationship evidence for dependants.
Family-related applications often require passport Uploading evidence as part of your visa application details, relationship evidence, and financial proof. UKVI also lists examples of relationship evidence in dependant cases, such as marriage certificates or birth certificates.
That is why you should not build your upload set from random blogs or someone else’s checklist. Build it from your own visa route and your own circumstances. In practice, many applicants will prepare some mix of the following:
- Passport and previous passports if relevant
- Financial evidence such as bank statements or savings proof
- Employment or business documents
- Invitation letter if relevant
- Accommodation details or host documents if relevant
- Relationship evidence for family or dependant applications
- CAS, CoS, TB certificate, English language evidence, or other route-specific records where required
Check scan quality
UKVI’s upload guidance is clear on the basics. Documents should be flat on the scanner, and nothing should cover the information on the page. In real terms, that means your files must be readable from edge to edge. No cropped corners. No cut-off stamps. No dark shadows from your phone. No blur from a shaky hand.
If you are scanning on a flatbed scanner, make sure the page sits straight. If you are using a phone, use bright light, avoid glare, and keep the camera parallel to the document. Review every page after scanning. A document that looks “mostly okay” on your phone may become unreadable when enlarged on a caseworker’s screen.
Keep the orientation consistent too. If one page is upright and the next one is sideways, the file looks messy and becomes harder to review.
Rename files clearly
UKVI advises applicants to use descriptive file names, and that is smart advice. A file named Passport_Bio_Page.pdf is far better than scan003_final_new2.pdf. Clear names reduce confusion during upload and during your own final review.
Good file names look like this:
- Passport_Bio_Page.pdf
- Bank_Statements_Jan_to_Mar.pdf
- Employment_Letter.pdf
- Sponsor_ID_and_Status.pdf
- Marriage_Certificate_Translation.pdf
This step feels small, but it makes a real difference when you have ten or fifteen files open at once.
Combine pages where needed
Related pages should usually stay together. A three-month bank statement should normally be one combined file, not six loose images uploaded in random order. The same applies to employment letters with attachments, translated documents with the original, or a passport set that includes the bio page and relevant stamped pages when requested.
Do not split one logical document into too many uploads unless the system forces you to. At the same time, do not merge unrelated evidence into one huge file that becomes hard to follow. The goal is clean grouping, not one-file chaos.
Where to Upload Documents for a UK Visa on VFS
Applicants usually reach the document upload stage after they complete the visa application, pay the fees, and move into the identity and appointment stage. UKVI says applicants are told what documents they need during the process and, if they need biometrics, they can book a visa application centre appointment as part of the application journey. VFS pages for UK visa customers also state that applicants can self-upload supporting documents online.
In most cases, the general flow looks like this:
- complete the online visa form
- pay the visa fee and any other required charges
- book biometrics if your route requires a visa application centre appointment
- access the supporting documents or upload section linked to your application
Do not panic if your screen looks a little different from what another applicant shows in a video. VFS portals can vary by country and by design update. The wording may say “supporting documents,” “upload documents,” or something similar. The structure may also differ slightly between outside-UK VFS flows and inside-UK UKVCAS flows. Focus on the logic, not the exact button label.
How to Self Upload Documents for UK Visa on VFS Step by Step
Step 1: Sign in to your visa application or VFS account
Return to the dashboard linked to your application. Use the same account or reference path given during your application journey. If you were redirected between UKVI and VFS at different stages, make sure you are entering the correct platform for document upload and appointment management.
Take a moment before you click anything. Check that you are looking at the right applicant profile, the right visa route, and the right appointment path.
Step 2: Open the document upload section
Look for the part of the portal that refers to evidence or supporting documents. UKVI’s evidence guidance says applicants upload documents once they reach the evidence section, then select the relevant evidence and choose the file from their device.
If your portal has a menu, do not assume the first screen is the upload page. Some systems place upload inside a later stage of the dashboard. Open the correct section and read the instructions before you start.
Step 3: Choose the right document category
This step matters more than people think. A document can be perfectly clear and still create confusion if it sits in the wrong category. Financial evidence should not sit under employment evidence. A sponsor’s status document should not be mixed with hotel bookings. A marriage certificate should not be buried inside general travel papers.
Common categories may include:
- identity documents
- financial evidence
- employment evidence
- accommodation or travel documents
- sponsor documents
- relationship documents
The exact category list varies. Use the closest accurate option available. If two categories seem similar, choose the one that best reflects the document’s real purpose in your case.
Step 4: Upload one file at a time and confirm success
UKVI says that when a file uploads successfully, it appears under the “Files added” heading, and you can then continue adding more evidence. That means you should not rush through the upload stage. Wait for each file to complete. Then check that it actually appears where it should.
Do not drag in ten files and assume the system handled them properly. Watch each upload. Confirm the file name. Confirm the category. Confirm that the file is visible in the uploaded list.
Step 5: Repeat for every required document
Upload in a logical order. A simple order works best: identity first, financial evidence next, then employment or study records, then travel or host evidence, then relationship or dependant documents where relevant.
Stop every few files and review what you have done. This is a better habit than uploading everything in one rush and checking only at the end. Small reviews catch mistakes early.
Step 6: Review all uploaded files before final submission or appointment
This is the step that protects your application from avoidable errors.
Check:
- readability
- correct category
- complete pages
- duplicates
- missing files
- translation pairs for non-English documents
- naming consistency
UKVI’s upload guidance specifically tells applicants to check their evidence and make changes before submission. Even where portal timing differs, that principle still holds. Review early. Do not leave everything to the night before biometrics.
What Documents Do Most UK Visa Applicants Usually Upload?
This is the section most readers look for first, but it needs one warning: there is no universal document list for every UK visa. UKVI decides evidence by visa type and by personal circumstances. Use this section as a practical map, not as a substitute for your own route guidance.
Identity documents
Most applicants start with a valid passport or travel document. Some routes may also involve previous passports, especially where travel history or prior stamps matter. Family guidance also refers to copies of the photo page and relevant pages from previous passports in some cases.
If a national ID is requested in your route or country context, include it as instructed.
Financial documents
Financial evidence often includes bank statements, savings proof, payslips, or sponsor financial records where relevant. Skilled Worker and Student routes can involve financial evidence depending on the circumstances, while family and visit applications often depend heavily on showing funds, income, or sponsor support.
Make sure statements are complete, recent, and readable. Partial statements are a common problem.
Employment or study documents
This section may include an employment letter, leave approval, salary confirmation, business registration for self-employed applicants, or student records. Student applicants usually need a CAS. Skilled Worker applicants normally rely on a certificate of sponsorship reference number and other work-related details.
Travel and accommodation documents
Use these carefully. Many blogs overstate their importance. For visitor applications, UKVI’s own supporting documents guide says hotel bookings and flight bookings are generally less useful as evidence unless the application is for transit. That means they should not replace stronger evidence such as finances, purpose of visit, work ties, study status, or sponsor details.
If you are staying with someone, host documents and an invitation letter can be more meaningful than a simple booking screenshot.
Relationship or family documents
Family and dependant cases often require proof of relationship. UKVI gives examples such as marriage or civil partnership certificates for a partner and birth certificates for a child. In some cases, applicants may also need evidence that family members live together or remain dependent.
How to Organize Documents So Your UK Visa File Looks Stronger
A tidy upload does not guarantee approval. Eligibility, credibility, and evidence quality still matter most. But clean organization makes your file easier to follow, and that helps avoid confusion.
A good order is:
- identity
- finances
- purpose of visit, work, or study
- sponsor or host evidence
- relationship evidence if relevant
- extra supporting background documents
This order works because it answers the most basic questions first. Who are you? Can you support yourself? Why are you going? Who is supporting or hosting you? How do your family links fit into the case?
Use short cover notes only when needed. For example, if one sponsor pays for your visit but your bank statement shows another related transfer, a short note can explain that link. Keep it brief and factual. Do not write long emotional letters that repeat the application form.
Common Mistakes When Self Uploading Documents on VFS
The most common mistake is poor scan quality. A caseworker cannot use what they cannot read.
The second big mistake is category confusion. Applicants sometimes upload everything under one heading because they want to finish quickly. That creates clutter.
Another common issue is partial evidence. A bank statement may miss one page. A passport scan may show the bio page but not a relevant visa or stamp page. A translation may be uploaded without the original document.
For non-English or non-Welsh documents, UKVI says applicants must provide certified translations. Forgetting this is one of the easiest ways to weaken a file.
Some applicants also upload outdated evidence. UKVI’s visitor guidance warns that certain documents are less useful, including bank statements more than one year old. The same guide also says hotel bookings and normal flight bookings are not strong supporting evidence for standard visit cases unless the application is for transit.
Another mistake is assuming optional documents are always unnecessary. Some evidence is not formally listed in every case, but it may still be useful if it explains your circumstances clearly. The key is relevance, not quantity.
The last big mistake is delay. Uploading at the final hour creates preventable stress. If the portal freezes, the browser fails, or one file will not upload, you have no room left to fix it.
Can You Edit or Replace Uploaded Documents After Uploading?
This is one of the most common questions because people often notice mistakes after they start uploading.
The honest answer is that it depends on the platform stage and the route. UKVI’s own evidence upload guidance says applicants should review and change their evidence before submission, and in that process no further evidence can be uploaded after submission. VFS-related workflows may differ by route and country, so applicants should not assume that they can always fix mistakes later.
That is why you should check three things in your own portal:
- can the file be deleted and re-uploaded
- does the upload area lock after a certain stage
- must all changes be completed before the biometric appointment
The safest rule is simple: act as if your first upload is your final upload. That mindset makes you more careful.
Do You Need to Bring Physical Copies to the VFS Appointment?
Even if you self-upload, you should still take your valid passport or travel document and your appointment paperwork. VFS centre instructions also vary by country, and some centre pages recommend colour copies of key passport pages or other documents even when applicants uploaded files online.
So do not rely only on a general article, including this one. Before your appointment, check the exact “what to bring” instructions for your local visa application centre. That local page is the one that matters on the day.
What If Your Documents Are Not in English?
If your documents are not in English or Welsh, UKVI says you must provide certified translations. This rule appears across UK visa guidance and is one of the clearest evidence requirements in the system.
Upload both:
- the original document
- the certified translation
Keep names, dates, and document labels consistent. If the original file is called Marriage_Certificate.pdf, use a matching name like Marriage_Certificate_Translation.pdf. That makes the pair easy to identify during review.
Troubleshooting VFS Upload Problems
File not uploading
Start with the basics. UKVI’s evidence guidance lists common acceptable file types such as PDF, PNG, JPG, and JPEG. If your file is in another format, convert it first. Also check whether the file is too large for the portal and whether the file name includes odd characters that the system may reject.
If the problem continues, try another browser or device. A simple rename and re-save often fixes stubborn upload errors.
Uploaded file not showing
Do not assume success just because you clicked upload. UKVI says a successful file appears in the uploaded list. Refresh the page if needed, but first confirm whether the file actually reached the list of added documents.
If it is missing, upload again carefully and watch for the confirmation step.
Portal timing out
This often happens when applicants wait until the last minute, use weak internet, or try to upload many large files in one session. Save progress where possible. Work on a stable connection. Start early enough that a technical problem does not turn into a full application problem.
Final Checklist Before You Attend Biometrics
Before your appointment, run through this final check:
- passport uploaded and original ready
- required financial evidence uploaded
- visa-specific documents included
- all non-English documents translated
- every scan is clear and complete
- each file sits in the correct category
- no duplicate or missing documents
- appointment confirmation saved
- local centre instructions checked for anything you must carry on the day
This small review can save you from most last-minute problems.
FAQs
Is self upload for UK visa on VFS better than assisted upload?
It is better if you can prepare clean files and upload them accurately. It can save money and give you more control. Assisted upload is better if you are likely to make file errors or struggle with scans.
Can I upload documents after booking my biometric appointment?
Often yes, but the exact timing depends on the route and portal stage. Do not assume you can upload right up to the last minute. Review the portal rules early.
Can I upload multiple pages in one PDF?
Yes, and that is often the best way to keep related evidence together, such as a full bank statement or a document plus its translation, as long as the portal accepts the file size and format. UKVI accepts PDF among its standard file types.
What happens if I upload the wrong document?
If the portal still allows editing, delete and replace it at once. If the system is locked, check your local process and do not wait until the appointment day to discover the issue. Review early.
Do I need colour scans for UK visa documents?
Not every document must be in colour, but some VFS centre instructions recommend colour copies of passport or travel document pages when applicants self-upload. If colour helps preserve stamps, marks, or document clarity, use it.
Should I upload flight tickets and hotel bookings?
Only if they are relevant, and do not treat them as your strongest evidence in a standard visit case. UKVI’s visitor guidance says hotel bookings and flight bookings are generally less useful evidence unless the trip is for transit.
Can I self upload documents for visitor, student, work, and family visas?
Yes, many applicants across those categories self-upload their supporting documents, but the document list changes by route and personal circumstances. Always follow your own visa guidance.
Conclusion
Self-uploading UK visa documents on VFS is not difficult once you break it into clear steps. The job is simple in principle: prepare the right evidence, scan it clearly, name it properly, place it in the right category, and review it before the system locks or before your biometric appointment.
The safest approach is not speed. It is careful preparation. Strong uploads come from strong file prep. If your passport, financial records, visa-specific documents, translations, and supporting papers are all clear and well organized, the process becomes much easier.
Use this checklist before you upload. Review your files once more before your appointment. Most of all, make sure your document set matches your visa category and your real circumstances, because that is what matters most in the end.